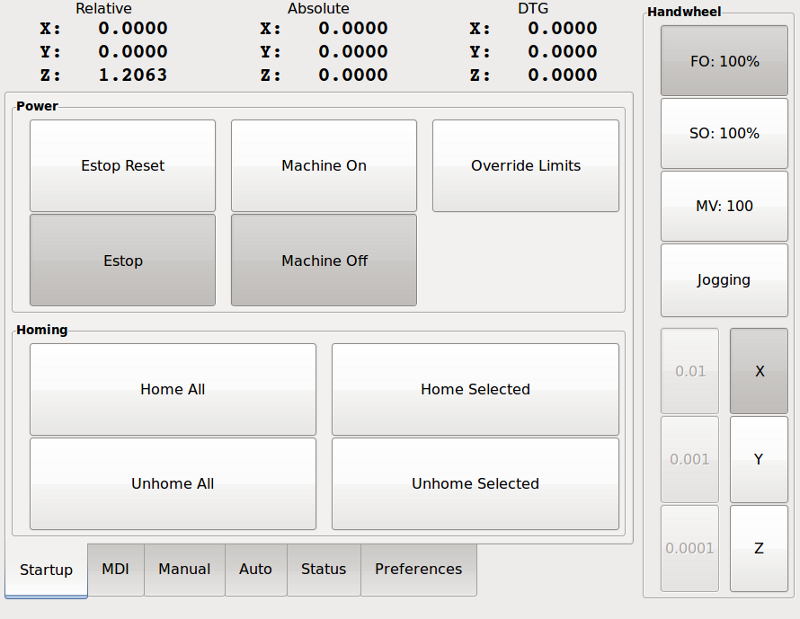
Touchy is a user interface for LinuxCNC meant for use on machine control panels, and therefore does not require keyboard or mouse.
It is meant to be used with a touch screen, and works in combination with a wheel/MPG and a few buttons and switches.
The Handwheel tab has radio buttons to select between Feed Override, Spindle Override, Maximum Velocity and Jogging functions for the wheel/MPG input. Radio buttons for axis selection and increment for jogging are also provided.

1. Panel Configuration
1.1. HAL connections
Touchy looks in the INI file, under the heading [HAL] for entries of POSTGUI_HALFILE=<filename>. Typically <filename> would be touchy_postgui.hal, but can be any legal filename. These commands are executed after the screen is built, guaranteeing the widget HAL pins are available. You can have multiple line of POSTGUI_HALFILE=<filename> in the INI. Each will be run one after the other in the order they appear in the INI file.
|
Note
|
Touchy used to require that you create a file named touchy.hal in your configuration directory (the directory your INI file is in). For legacy reasons this will continue to work, but INI based postgui files are preferred. |
For more information on HAL files and the net command see the HAL Basics.
Touchy has several output pins that are meant to be connected to the motion controller to control wheel jogging:
-
touchy.jog.wheel.increment, which is to be connected to the axis.N.jog-scale pin of each axis N.
-
touchy.jog.wheel.N, which is to be connected to axis.N.jog-enable for each axis N.
|
Note
|
N represents the axis number 0-8. |
-
In addition to being connected to touchy.wheel-counts, the wheel counts should also be connected to axis.N.jog-counts for each axis N. If you use HAL component ilowpass to smooth wheel jogging, be sure to smooth only axis.N.jog-counts and not touchy.wheel-counts.
-
Abort button (momentary contact) connected to the HAL pin touchy.abort.
-
Cycle start button (momentary contact) connected to touchy.cycle-start.
-
Wheel/MPG, connected to touchy.wheel-counts and motion pins as described above.
-
Single block (toggle switch) connected to touchy.single-block.
-
For continuous jog, one center-off bidirectional momentary toggle (or two momentary buttons) for each axis, hooked to touchy.jog.continuous.x.negative, touchy.jog.continuous.x.positive, etc.
-
If a quill up button is wanted (to jog Z to the top of travel at top speed), a momentary button connected to touchy.quill-up.
-
touchy.jog.active shows when the panel jogging controls are live.
-
touchy.status-indicator is on when the machine is executing G-code, and flashes when the machine is executing but is in pause/feedhold.
1.2. Recommended for any setup
-
Estop button hardwired in the estop chain
2. Setup
2.1. Enabling Touchy
To use Touchy, in the [DISPLAY] section of your INI file change the display selector line to DISPLAY = touchy.
2.2. Preferences
When you start Touchy the first time, check the Preferences tab. If using a touchscreen, choose the option to hide the pointer for best results.
The Status Window is a fixed height, set by the size of a fixed font. This can be affected by the Gnome DPI, configured in System / Preferences / Appearance / Fonts / Details. If the bottom of the screen is cut off, reduce the DPI setting.
All other font sizes can be changed on the Preferences tab.
2.3. Macros
Touchy can invoke O-word macros using the MDI interface. To configure this, in the [TOUCHY] section of the INI file, add one or more MACRO lines. Each should be of the following format:
MACRO=increment xinc yinc
In this example, increment is the name of the macro, and it accepts two parameters, named xinc and yinc.
Now, place the macro in a file named increment.ngc, in the PROGRAM_PREFIX directory or any directory in the SUBROUTINE_PATH.
It should look like:
O<increment> sub
G91 G0 X#1 Y#2
G90
O<increment> endsub
Notice the name of the sub matches the file name and macro name exactly, including case.
When you invoke the macro by pressing the Macro button on the MDI tab in Touchy, you can enter values for xinc and yinc. These are passed to the macro as #1 and #2 respectively. Parameters you leave empty are passed as value 0.
If there are several different macros, press the Macro button repeatedly to cycle through them.
In this simple example, if you enter -1 for xinc and press cycle start, a rapid G0 move will be invoked, moving one unit to the left.
This macro capability is useful for edge/hole probing and other setup tasks, as well as perhaps hole milling or other simple operations that can be done from the panel without requiring specially-written G-code programs.