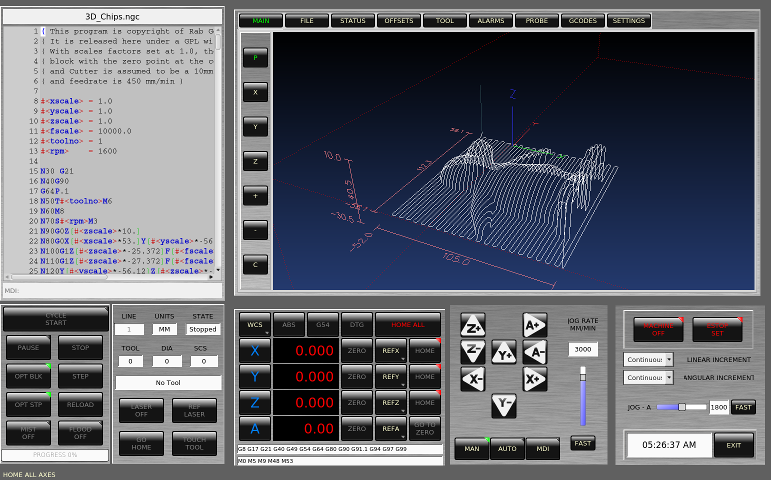
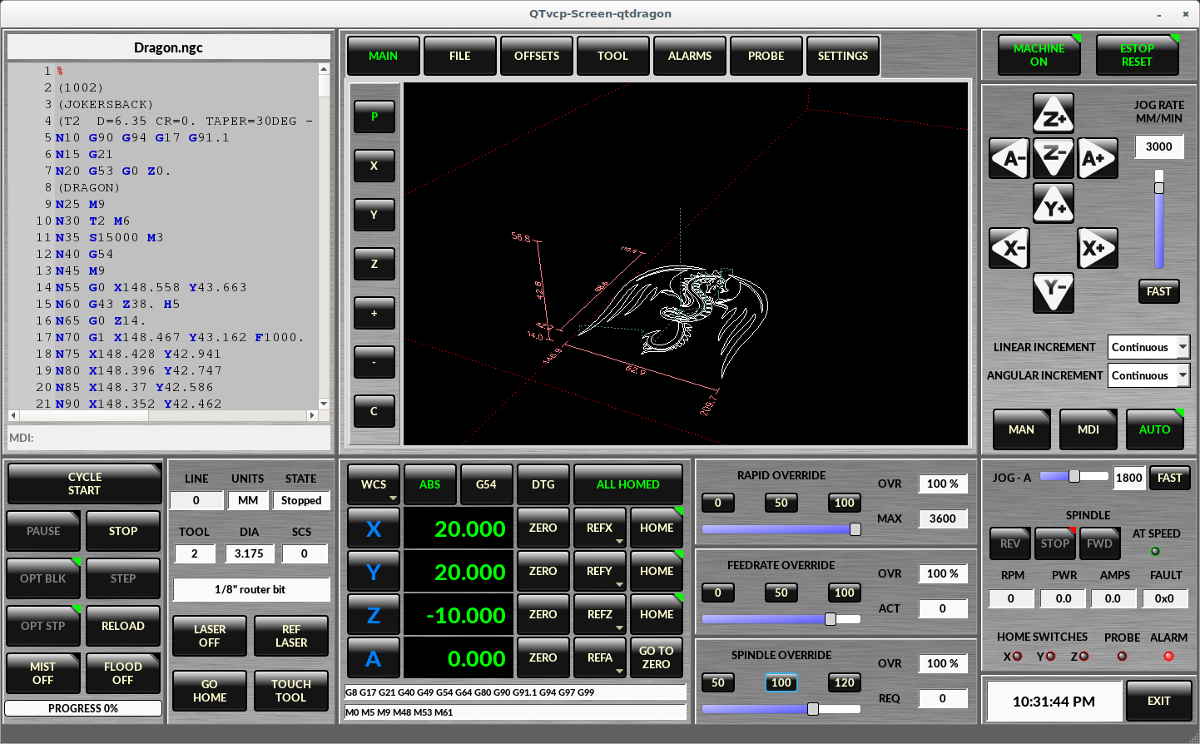
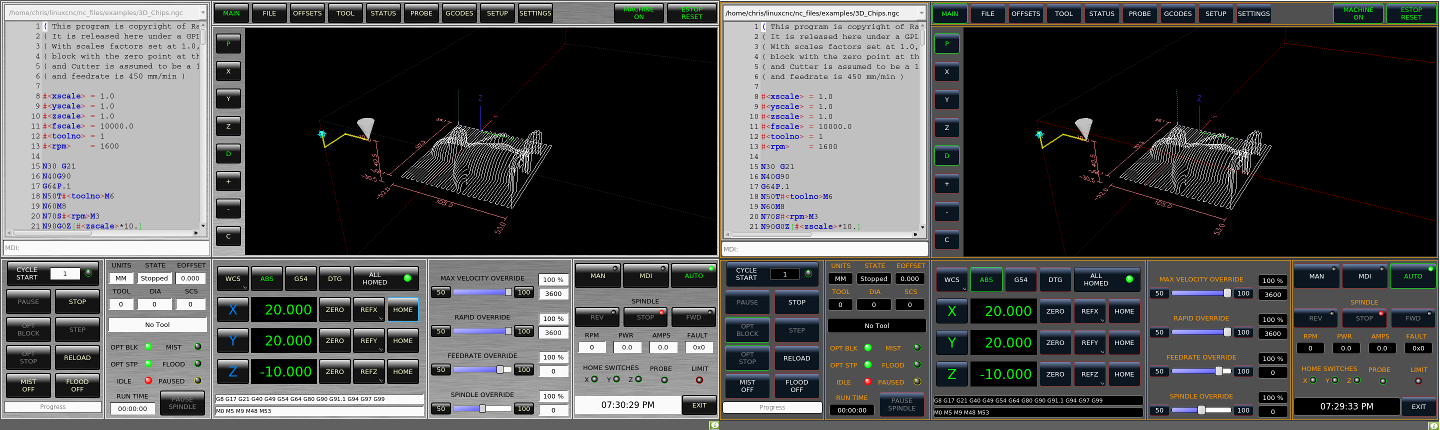
SilverDragon GUI
1. Introduction
SilverDragon is built with the QTVCP framework. Much of it is based on the excellent work of others in the LinuxCNC community.
|
Note
|
SilverDragon and QtVcp are new programs added into linuxcnc. Bugs and oddities are possible. Please test carefully when using a dangerous machine. Please forward reports to the forum or maillist. |
2. Getting Started
If your configuration is not currently set up to use SilverDragon,
you can change it by editing the INI file.
In the section [DISPLAY] change the DISPLAY line to read:
Display Section
[DISPLAY]
DISPLAY = qtvcp qtdragon
To keep track of preferences, qtdragon looks for a preference text file.
add the following entry under the [DISPLAY] heading.
(other options are possible see the qtvcp’s screenoption widget docs.)
PREFERENCE_FILE_PATH = WORKINGFOLDER/qtdragon.pref
You can specify where to save history/logs.
In the section [DISPLAY] add:
MDI_HISTORY_FILE = mdi_history.dat
MACHINE_LOG_PATH = machine_log.dat
LOG_FILE = qtdragon.log
For the basicprobe routines to work the SUBROUTINE_PATH must be set properly.
(Your path may be different then this sample)
RS274ngc Section
[RS274NGC]
SUBROUTINE_PATH = ../../../../nc_files/probe/basic_probe/macros
It also requires extra analog I/O pins for probing.
Make sure this line in the HAL file has the num_aio=13 entry:
The rest of the line depends on your setup and could be different and should not be changed.
loadrt motmod servo_period_nsec = [EMCMOT] SERVO_PERIOD num_joints = 4 num_aio = 13
SilverDragon has custom INI entries:
[TOOLSENSOR]
MAXPROBE = 40
SEARCH_VEL = 200
PROBE_VEL = 50
TOUCH = 29.7

[LASER]
X = 106.9
Y = -16.85
The sample configuration
sim/qtvcp_screens/qtdragon/qtdragon_xyza.ini is already configured to use SilverDragon as its front-end.
There are several others, to demonstrate different machine configurations.
3. Key Bindings
SilverDragon is not intended to primarily use a keyboard for machine control.
There are several key presses that will control the machine for convenience.
F1 - Estop on/off
F2 - Machine on/off
F12 - Style Editor
Home - Home All Joint of the Machine
Escape - Abort Movement
Pause -Pause Machine Movement
4. Buttons
Buttons that are checkable will change their text colour when checked.
5. Virtual Keyboard
QtDragon includes a virtual keyboard for use with touchscreens.
To enable the keyboard, check the Use Virtual Keyboard checkbox in the Settings page.
Clicking on any input field, such as probe parameters or tool table entries, will show the keyboard.
It can also be shown by clicking the KEYBD button on the top of the screen,
unless the machine is in AUTO mode. To hide the keyboard, do one of the following:
- click the MAIN page button
- click the KEYBD button
- go into AUTO mode
It should be noted that keyboard jogging is disabled when using the virtual keyboard.
6. HAL Pins
These pins are specific to the qtDragon screen, There are of course are many more HAL pins
that must be connected for linuxcnc to function.
If you need a manual tool change prompt, add these lines in your postgui file.
net tool-change      hal_manualtoolchange.change   <=  iocontrol.0.tool-change
net tool-changed     hal_manualtoolchange.changed  <=  iocontrol.0.tool-changed
net tool-prep-number hal_manualtoolchange.number   <=  iocontrol.0.tool-prep-number
These pins must be connected in the postgui file for probing to work:
net xwidth           motion.analog-out-00 => qtdragon.x_width
net ywidth           motion.analog-out-01 => qtdragon.y_width
net avg_dia          motion.analog-out-02 => qtdragon.avg_diameter
net edge_angle       motion.analog-out-03 => qtdragon.edge_angle
net edge_delta       motion.analog-out-04 => qtdragon.edge_delta
net xminus           motion.analog-out-05 => qtdragon.x_minus
net yminus           motion.analog-out-06 => qtdragon.y_minus
net zminus           motion.analog-out-07 => qtdragon.z_minus
net xplus            motion.analog-out-08 => qtdragon.x_plus
net yplus            motion.analog-out-09 => qtdragon.y_plus
net xcenter          motion.analog-out-10 => qtdragon.x_center
net ycenter          motion.analog-out-11 => qtdragon.y_center
net cal_offset       motion.analog-out-12 => qtdragon.cal_offset
This input pin should be connected to indicate probe state:
qtdragon.hal_led_probeThese pins can be connected to indicate home switch states:
qtdragon.hal_led_home_x
qtdragon.hal_led_home_y
qtdragon.hal_led_home_z
These pins are inputs related to spindle VFD indicating:
qtdragon.modbus-errors
qtdragon.spindle_amps
qtdragon.spindle_fault
qtdragon.spindle_volts
This pin is an output to the spindle control to pause it:
qtdragon.spindle_pauseThis output pins can be connected to turn on a laser:
qtdragon.btn_laser_onThese output pins indicate buttons that were pushed, they are probably of limited use:
qtdragon.btn_dimensions
qtdragon.btn_gcode_edit
qtdragon.btn_home_x
qtdragon.btn_home_y
qtdragon.btn_home_z
qtdragon.btn_jog_a_slow
qtdragon.btn_jog_l_slow
qtdragon.btn_keyboard
qtdragon.btn_probe_help
qtdragon.btn_probe_mode
qtdragon.btn_select_log
qtdragon.btn_tool_add
qtdragon.btn_tool_delete
These pins are related to external offsets if they are used:
qtdragon.eoffset_clear
qtdragon.eoffset_count
qtdragon.eoffset_enable
qtdragon.eoffset_value
qtdragon.led_eoffset_limit
7. HAL files
The HAL files supplied are for simulation only. A real machine needs its own custom HAL files. The qtdragon screen works with 3 or 4 axes with one joint per axis or 3 or 4 axes in a gantry configuration. (2 joints on 1 axis)
8. Manual Tool Changes
If your machine requires manual tool changes, SilverDragon can pop a message box to direct you.
You must connect the proper HAL pin in the post_gui file.
For example:
net tool-change      hal_manualtoolchange.change   <=  iocontrol.0.tool-change
net tool-changed     hal_manualtoolchange.changed  <=  iocontrol.0.tool-changed
net tool-prep-number hal_manualtoolchange.number   <=  iocontrol.0.tool-prep-number
9. Spindle
The screen is intended to interface to a VFD, but will still work without it. There are a number of VFD drivers included in the linuxcnc distribution. It is up to the end user to supply the appropriate driver and HAL file connections according to his own machine setup.
10. Probing
The probe screen has been through basic testing but there could still be some minor bugs. When running probing routines, use extreme caution until you are familiar with how everything works. Probe routines run without blocking the main GUI. This gives the operator the opportunity to watch the DROs and stop the routine at any time.
|
Note
|
Probing is very unforgiving to mistakes; be sure to check settings before using. |
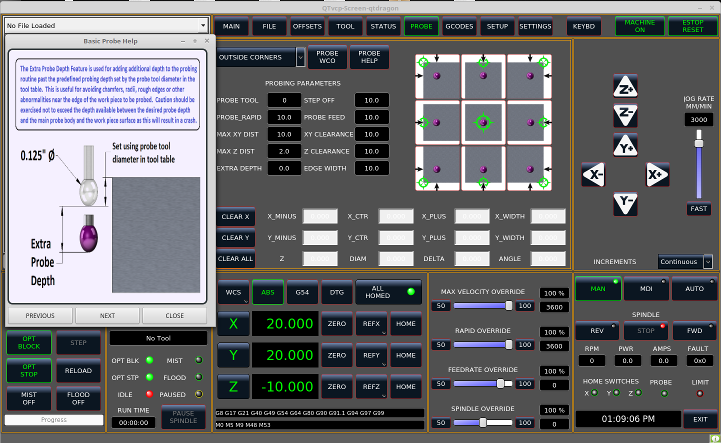
QtDragon has 2 possible methods for setting Z0. The first is a touchplate, where a metal plate of known thickness is placed on top of the workpiece and then the tool is lowered until it touches the plate, triggering the probe signal. Z0 is set to probe height - plate thickness.
The second method uses a tool setter in a fixed position and a known height above the table where the probe signal will be triggered. In order to set Z0 to the top of the workpiece, it has to know how far above the table the probe trigger point is (tool setter height) and how far above the table the top of the workpiece is. This operation has to be done every time the tool is changed as the tool length is not saved.
For touching off with a touch probe, whether you use the touchplate operation with thickness set to 0 or use a probing routine, the height from table to top of workpiece parameter is not taken into account and can be ignored. It is only for the tool setter.
11. Run from Line
A gcode program can be started at any line by clicking on the desired line in the gcode display while in AUTO mode.
It is the operator’s responsibility to ensure the machine is in the desired operational mode.
A dialog will be shown allowing the spindle direction and speed to be preset.
The start line is indicated in the box labelled LINE, next to the CYCLE START button.
The run from line feature can be disabled in the settings page.
|
Note
|
Linuxcnc’s run-from-line is not very user friendly. eg. It does not start the spindle or confirm the proper tool. It does not handle subroutines well. If used it is best to start on a rapid move. |
12. Laser buttons
The LASER ON/OFF button in intended to turn an output on or off which is connected to a small laser crosshair projector. When the crosshair is positioned over a desired reference point on the workpiece, the REF LASER button can be pushed which then sets the X and Y offsets to the values indicated by the LASER OFFSET fields in the Settings page and the INI file.
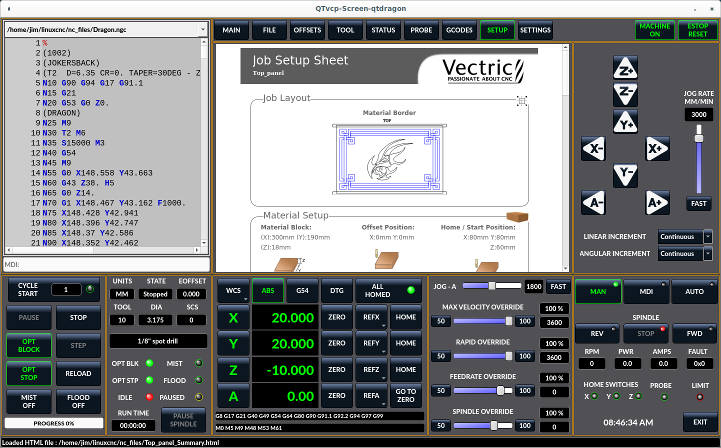
13. Setup Tab
It’s possible to load Html file (.html ending) with setup notes. They will be displayed in the setup tab.
Some program, such as Fusion and Aspire will create this files for you.
14. Styles
Nearly all aspects of the GUI appearance are configurable via the qtdragon.qss stylesheet file. The file can be edited manually or through the stylesheet dialog widget in the GUI. To call up the dialog, press F12 on the main window. New styles can be applied temporarily and then saved to a new qss file, or overwrite the current qss file.
15. Screen resolution
This GUI was initially developed for a screen with 1440 x 900 resolution. It is not resizable. It will work in window mode on any monitor with higher resolution but not on monitors with lower resolution.
16. Customization
All aspects of the GUI are fully customizable through qtdesigner. This is included with the qtvcp development environment. The extensive use of qtvcp widgets keeps the amount of required python code to a minimum, allowing relatively easy modifications. The LinuxCNC website has extensive documentation on the installation and use of qtvcp libraries. QtVCP Overview for more information